The Office Chairiot At Sema 2014

SEMA is a 50-some-odd-year-old convention for automotive industry peeps to show off their wares to buyers and enthusiasts who are industry insiders. Local Motors is an automotive and general vehicular innovator and co-creation company who is making another 3D printed car at this year's SEMA.

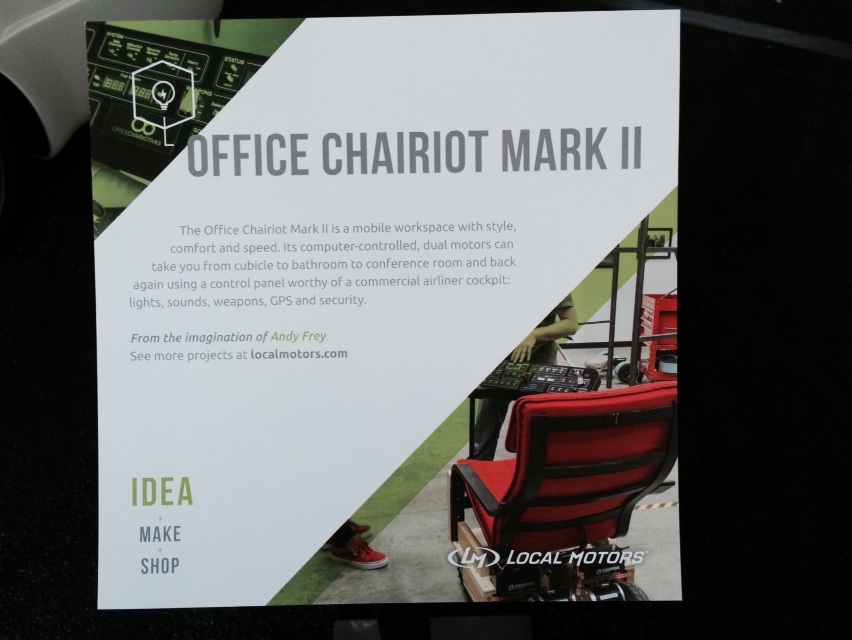
The Office Chairiot is a "Personal Project" on the Local Motors website. As such, it gets loving and attention from the engineers and smarty-smart people at LM Labs, a community collaboration and maker space for anyone who has ideas they wish to move to the next level, especially ideas around transportation. LM Labs liked the Office Chairiot enough to sponsor it in the Labs and to help develop it further from a silly, over-engineered, 1½ orsepower IKEA chair to a full-fledged platform for movin' stuff!
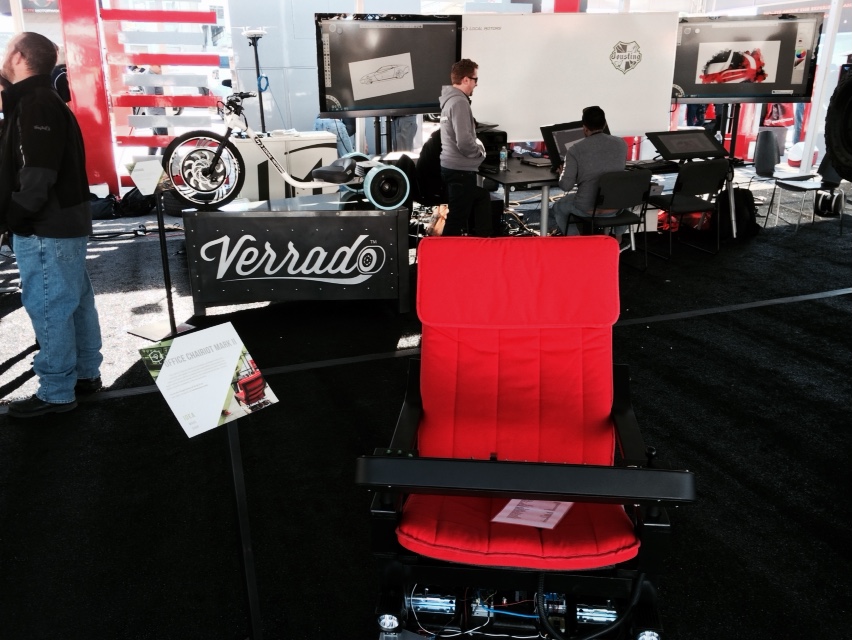
All that said, ​Local Motors asked if the Office Chairiot could be displayed in their Idea Booth at SEMA 2014. The answer was a no-brainer and here we are in Las Vegas!

image.jpg


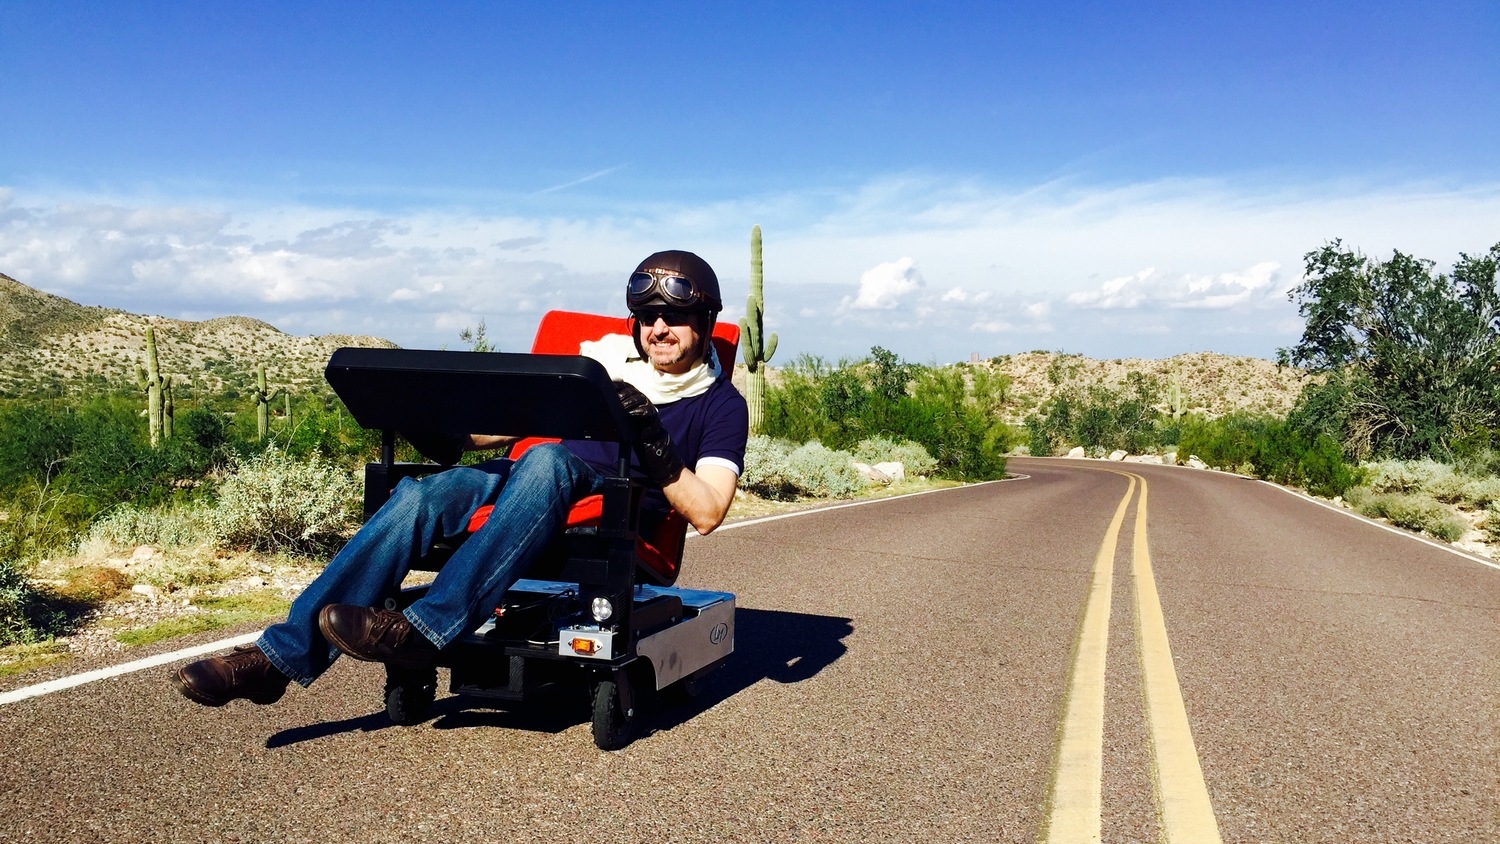
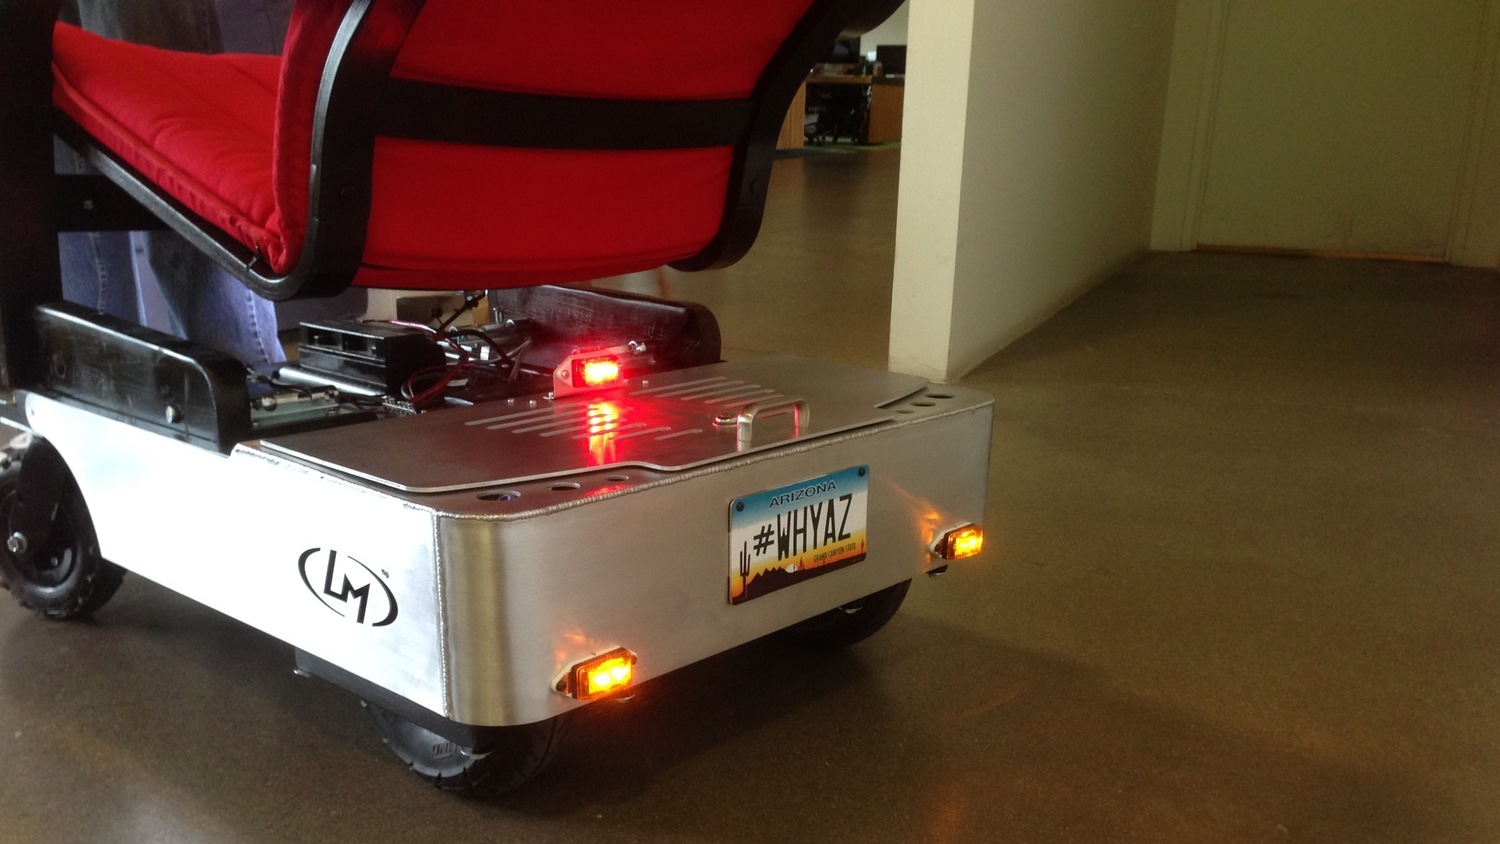
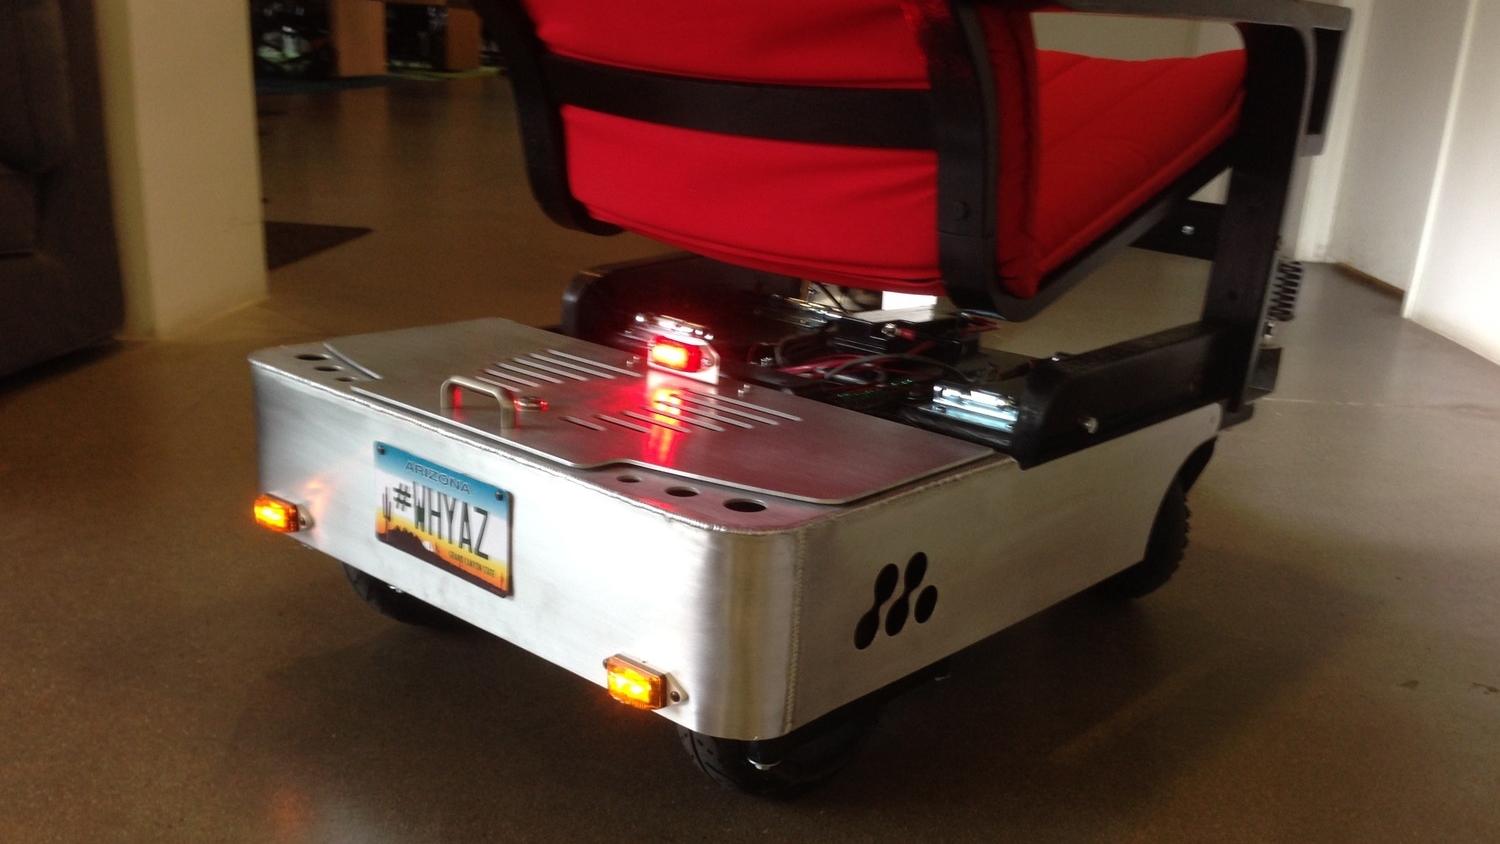
4 weeks ago, the chassis looked like that (above). The IKEA chair was semi-permanently, if not inconveniently bolted to the chassis and the chassis was bare pine. I had to scramble to get the beast "show ready" for SEMA. A little glossy black spray paint, some minor upgrades later and she's show ready, save for a few features, like sound and wireless control.


image.jpg

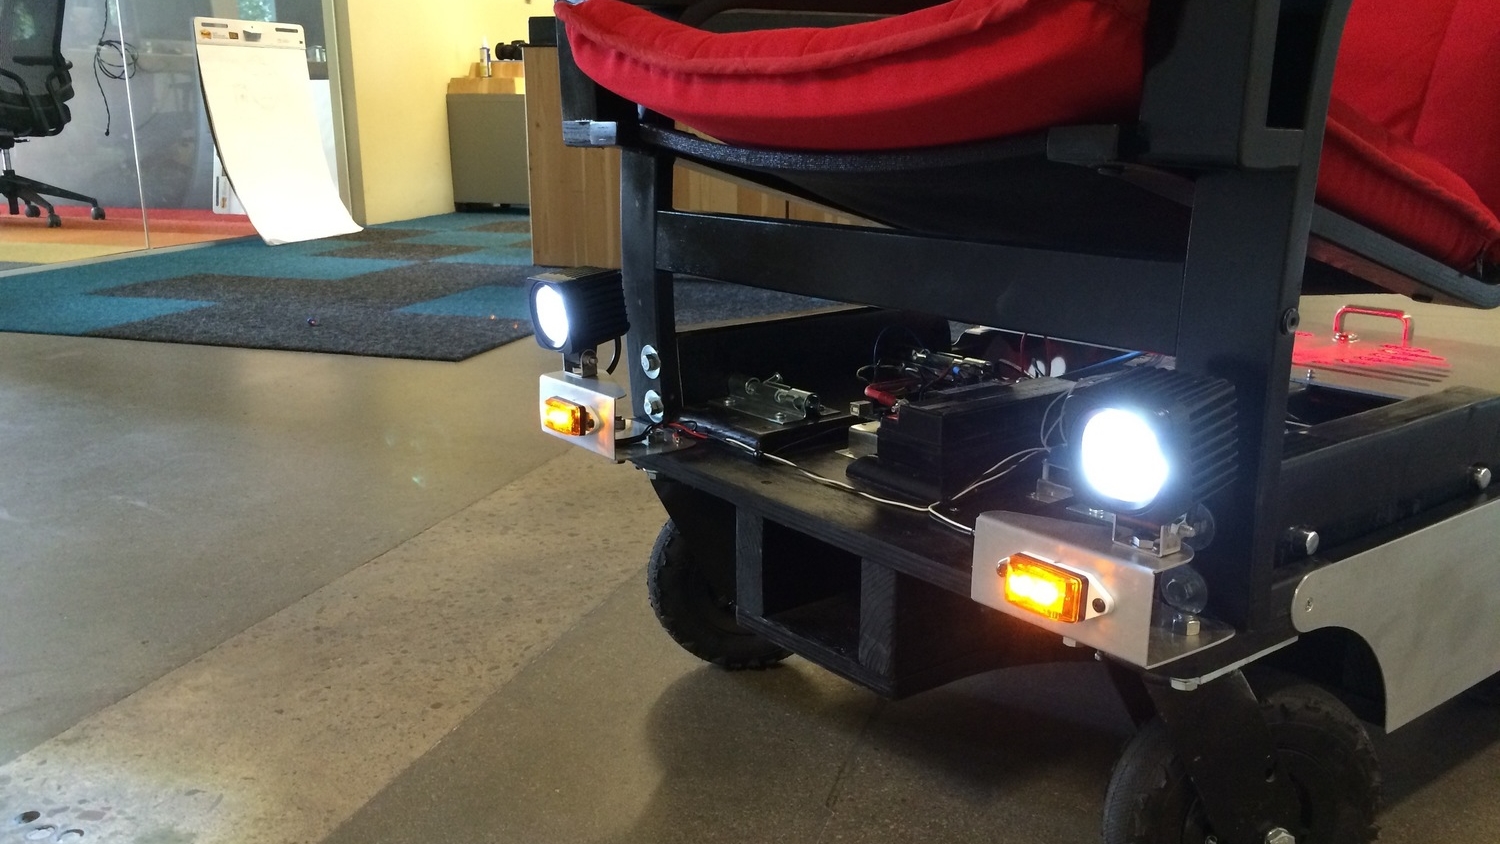
She came together pretty well and I was able to drift her all over the pavement in front of the Idea Booth at SEMA 2014. The only bummer was that the lighting wasn't functional while the chair was in drivable condition. Those two major feature sets were mutually exclusive. So, one day the crowd got a light show, most of the other days they got an IKEA chair drifting show.

Here's a quick video of the lighting being controlled from the key fob:


Here's a quick video of the Office Chairiot Mk II drifting at SEMA 2014:

Who doesn't love drifting at a huge automotive show?? More importantly, who doesn't love IKEA chair drifting at an automotive show?? I know I love it! The Office Chairiot is making a big splash at SEMA 2014 in Las Vegas. It gets an audience when it's out and about. Very special thanks to meltmedia and Local Motors for helping make this thing a functional, albeit it completely silly contraption of entertainment and fun!

Not bad for the first official public showing!

Mad Scramble Before SEMA 2014 for Office Chairiot Mark II

I was able to get it mostly brushed-looking. :D I keeping adding fingerprints to it as I work around it. I'll give it one more once-over before the trip to Vegas.

Special thanks to @mattjackson for helping me turn out those light brackets, license plate and motor compartment lid so quickly the other day. Here are the pieces in-place on the chassis:

The relay board is installed and each 12V light on the chassis can be easily controlled by the Arduino that's onboard:

Here they are powered and switched to the closed position:

The NeoPixel RGB LEDs are all in-place and ready to be controlled. I have 4 3A UBECs (Universal Battery Eliminator Circuits) on the chassis to supply up to 12A for all 120 NeoPixels, which fully lit to brightest white would draw over 7A. I put some wiggle room in each section of LEDs. Here are the LEDs on the bottom of the chassis:

Each NeoPixel is individually addressable, so it should be fun to make animated patterns under the Chairiot, especially while in motion. I'm thinking about tying the RPM sensors to smoothly sweep colors under the chassis to match the speed of the chair.

The Arduino on the chassis handles controlling of the Sabertooth 2x60 motor controller, individual 12V lights, NeoPixels and reading of sensors (temperature, RPM, etc.). It takes a cool, simple little protocol to command it and a simple RJ-45 port for control devices to use to communicate with it. OR, you can jack in a Bluetooth, Zigbee or other RF module capable or regular serial over UART to easily wirelessly control the chassis, lights and all! Here's a screenshot of the help text I had in the firmware while testing it:

I'll be simplifying that down to just bits and bytes once I'm finished hand-commanding it over serial from the computer. I'll blog about how I do the safety stuff and the communications handshake and all that. It's also listed in the "Details" section of this website, if you're interested in the nitty-gritty. The protocol is pretty detailed, but super-simple to use.

Big Photo Shoot for New Website

The Saturday before SEM 2014, Dave Woodruff and I took the beast out to South Mountain Park in beautiful Phoenix, AZ to get some quality product shots of her. The weather was amazing and Dave's eye for design and photography really shined. Here are some of the photos he shot (and a few I grabbed while it was just sitting there without me on it):

You'll recognize a couple of them from the website. I just thought I get some more up here in case I forgot to use them somewhere else. Enjoy!

BIG SEMA Preparedness Updates on Office Chairiot Mk II!!

Another bunch of upgrades happened over the past week, as well.

First off, the chassis got a proper gloss black paint job (glossy as semi-sanded pine get get, anyway):

I didn't put too much effort in to sanding it all plastic-smooth, since we're planning on replacing this chassis with a proper aluminum one after SEMA. Here's the main frame of the chassis drying:

Put some warp drive nacelles on that thing and it's a Star Trek starship.

I even hit the front caster forks for some added... Um... Black.

And here's the finished black chassis:

Notice, too the new control mounting brackets on the fronts of the IKEA chair arms. They're made from the parts of the chair legs I cut off. A little ebony wood filler and some black paint and you'd think IKEA was making special Office Chairiot Mark II edition Poäng chairs!

Another upgrade: The batteries are all sitting inside the chassis cavities to keep the profile of the chassis and drive system as low profile as possible:

I moved the motor controller and contactor down into the space I had originally intended to use for the Accessories battery. The Accessories battery is now sunken into a slot just forward of that space. There's now plenty of clearance for the chair to bounce around. Also notice that there is a proper ground bus bar and a 12-volt bus bar to make quick work of connecting things together. There is no 24-volt bus bar because the only thing using that voltage is the motor controller and motors. I do have an extra bar in case I add 24-volt accessories, but I don't anticipate that.

The last upgrade I made yesterday was what I call the "Fast Latch" system for quickly changing what rides atop of the motorized base of the Office Chairiot Mark II:

The chair, wagon box or whatever else might sit on top of the chassis has 2x4 size rails that fit in slots on the left and right edges of the chassis. There are holes in the rails that those four heavy-duty bolt latches slide into.

The bolts are screwed all the way into the chassis' top plate, so once the chair is locked in, you can lift the entire chassis by the chair, yet you can attach and detach the chair in 5 seconds.

In keeping with the "show readiness" theme for SEMA, I painted the bolt bases gloss black, of course. :)

There they are in action. They're rock solid and it's so nice to be able to so quickly remove and install the chair, I have to say. It will make showing off the chassis guts WAY faster and easier. Plus, I hope to have the wagon-wall accessory completed in time for SEMA. That's actually a simple build, but will be a really cool addition to show the versatility of this motorized base.

Fabrication of Aluminum Parts Begins!

Thanks so much @gwilson (over on the Local Motors Projects website) for your help with the new aluminum motor brackets. Can't wait to finish those up and get the motors back on this bad boy.

Galen whipped together designs Saturday morning for new motor mounts made from aluminum to replace the old bulky wooden sleds I'd made in haste. Here are the waterjet-cut parts:

The back (non-sprocket-stickin'-out-of) side of each motor has a couple of bolt heads sticking out, so Galen designed one side of the motor bracket to go straight across the back. To make the Office Chairiot even faster, he added "speed holes:"

I think those add about 5 MPH to its top speed. We'll have to verify once I get the LCD on the control panel working again so we can see real speed data.

It might be a little difficult to see on a darker screen, but I added "wing walk" grippy self-adhesive pieces to the chassis where the motor mounts will sit to help lock the base plates of the mounts into place once the nuts are tightened.

Here's what the motor bracket piece of the mounts look like in semi-action:

The base plates will have a hinge feature to allow us to rotate the motors up and down to tension the drive chains. The hole at the "nose" of the brackets is for a bolt that will set the rotation of the motor and lock it. The plates will have matching slots to allow us to accurately align the sprockets of the motors and the wheels.